Summary:
Objective: Find a technique for locating LightSwitch screens in different languages.
Methods: For the approach to this technique of creating a Shell (taking as starting point the official information from Microsoft on a cración Shell), Shell adds this control to change languages.
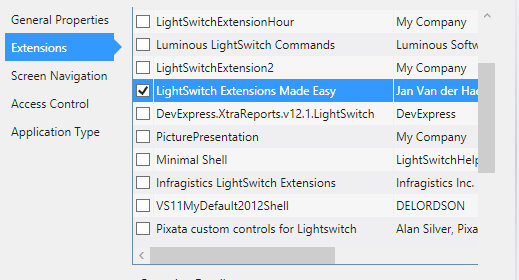
To facilitate debugging of Shell, I used the essential Extension of Jan Van Der Haegen LightSwitchExtensionsMadeEasy.
LightSwitch application and Shell are connected by a agreggator. When changing LighSwitch receives Shell language, reading comes to localized resources. From that time the culture has changed LightSwitch Application. When we open a new screen read the resource file and locate the items in the Screen by DisplayName,
Results: You can locate the screens in multiple languages using resource files resx, but for larger applications can alter this technique to read the resources dynamically and that are not incorporated in the application xap.
Conclusions: It is a first approach and not localize menus or other elements outside the Screen. But the road from here is easy and can be easily extrapolated. This article does not solve the problem of location LightSwitch, it should work as Silverlight or Asp.net but offers an alternative technique with which you can reuse our location files when Microsoft corrects the problem.
What is known?
LightSwitch localization not working as expected. If we need our application to work in 5 different languages at this time the Microsoft solution is to compile the application 5 times. OOP much for this?
http://visualstudio.uservoice.com/forums/121579-visual-studio/suggestions/2202505-support-application-in-multiple-languages
http://social.msdn.microsoft.com/Forums/en-US/lightswitchgeneral/thread/90b1f8e9-25ab-4d64-a16f-e64efc191eeb
http://blogs.msdn.com/b/global_developer/archive/2011/09/28/lightswitch-how-to-change-the-run-time-language.aspx
http://lightswitchhelpwebsite.com/Forum/tabid/63/aft/525/Default.aspx
SoftlandingCanada: There is also a commercial solution called DockShell in facing location using PRISM.
http://www.youtube.com/watch?v=47hyerUBIag&feature=youtu.be
What gives?
This technique is easy to find content, can be implemented in any LightSwitch application, no need for a special Shell, Here we have developed one to have somewhere to put the language change, but they could have done from a button on a screen. It is transparent. It’s free.
Introduction.
Thinking that he could not locate resource files LightSwitch with me think only in small applications. Sometimes it is not even necessary that large applications, some countries have different cultures, Catalunya, Belgium, Finland, Cyprus, etc …
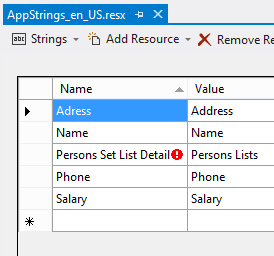
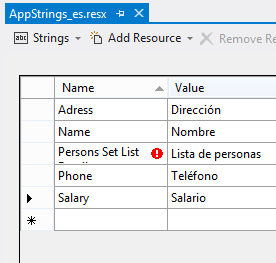
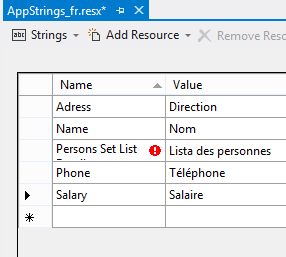
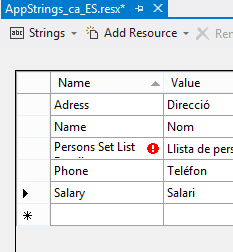
My attempts began trying to LighSwitch as Silverlight or ASPNET, creating my resx resource files: AppStrings.en-us.resx, AppStrings.es.resx, AppStrings.ca-ES.resx, AppStrings.fr.resx. After changing played Thread:
Thread.CurrentThread.CurrentCulture = Thread.CurrentThread.CurrentUICulture = new System.Globalization.CultureInfo ("ca-ES");
I was very happy when I saw that there was trouble in LightSwitch change, so I thought that was sucked.
The next step was the ResourceManager, here my troubles began:
man = new ResourceManager ("LightSwitchApplication.Localization.AppStrings", typeof (AppStrings). Assembly);
I always returned the Invariant Culture culture that was not selected, in the properties of LightSwitch.
From here began the sleepless nights …
Solution
It seems that within LightSwitch ResourceManager not change the resource file by culture, the solution is to create separate resx files and read us as the selected language.
 switch (PresentationParams[0])
                {
                    case "en-US":
                        man = new ResourceManager("LightSwitchApplication.Localization.AppStrings_en_US", typeof(AppStrings_en_US).Assembly);
                        break;
                    case "ca-ES":
                        man = new ResourceManager("LightSwitchApplication.Localization.AppStrings_ca_ES", typeof(AppStrings_ca_ES).Assembly);
                        break;
                    case "es":
                        man = new ResourceManager("LightSwitchApplication.Localization.AppStrings_es", typeof(AppStrings_es).Assembly);
                        break;
                    case "fr":
                        man = new ResourceManager("LightSwitchApplication.Localization.AppStrings_fr", typeof(AppStrings_fr).Assembly);
                        break;
                    default:

                        break;
                }
From this moment already correctly read the resource file. All this you can implement without the example that show the practical development of this approach to the localization of LightSwitch.
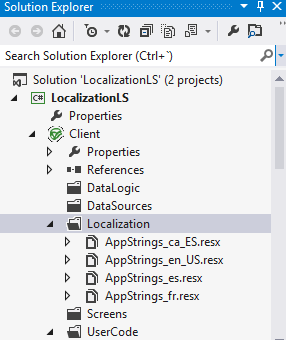
LocalizationLS, the example
Before I recommend downloading some resources:
Extensions made easy (Jan Van Der Haegen)
CodeLocalization.rar(Snippets of code for this article)
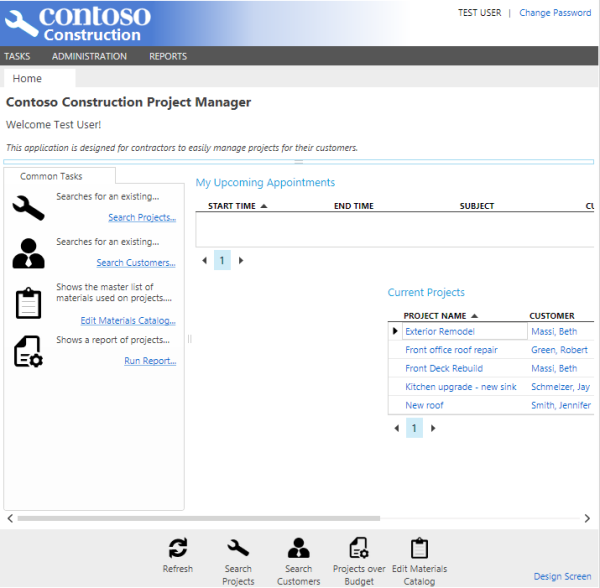
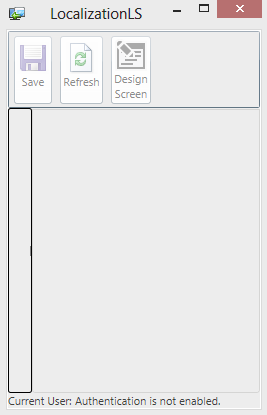
You can test the result of how-to on: http://www.jmlabs.org.es/localizationls
Step 1 of 10
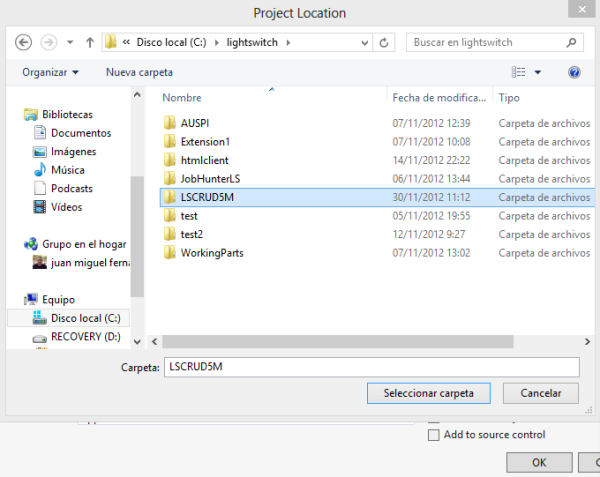
We start by creating a LightSwitch application, with an effort of imagination we call LocalizationLS
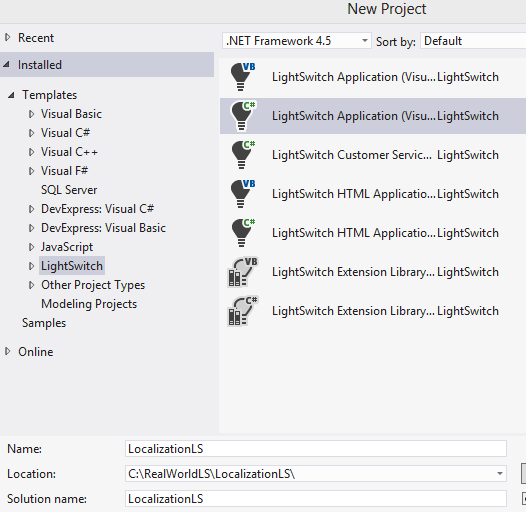
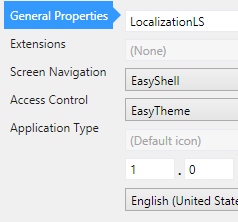
Double click on properties and review various things
Here we have selected the default location, ie preselected culture LightSwitch application startup

Activate the useful extension created by Jan Van Der Haegen, we will use for the development of our shell with location
For now close our project and save changes.
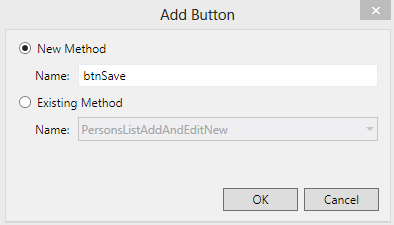
Step 2 of 10
Create a new LightSwitch Extension Project
We put the name of Shell Localization
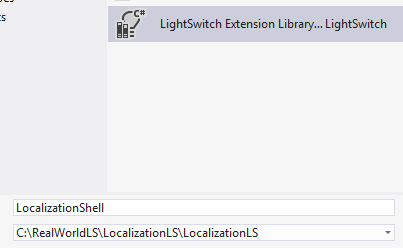
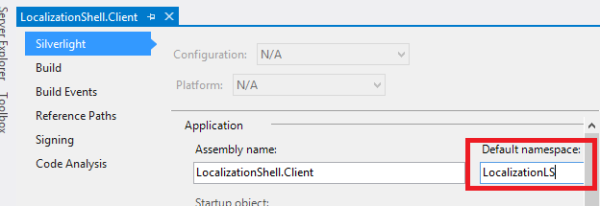
We change the NameSpace of LocalizationShell to LocalizationLS (Double click on properties)
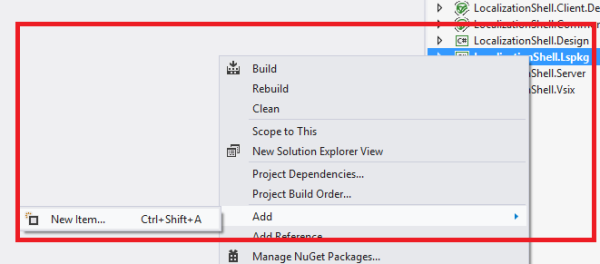
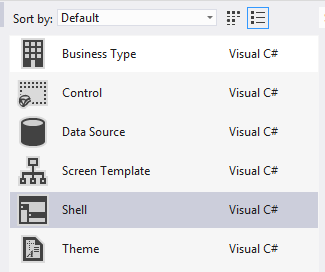
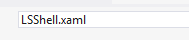
The project Lspkg add a new item named Shell type LSShell
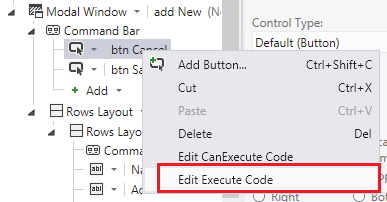
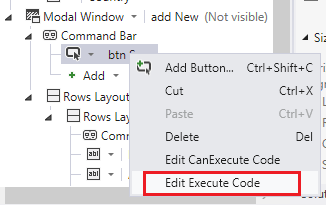
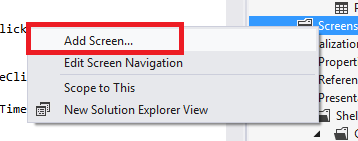
Step 3 of 10
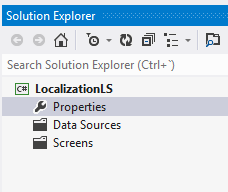
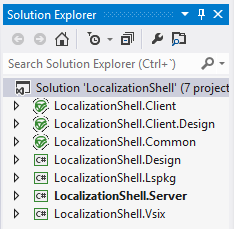
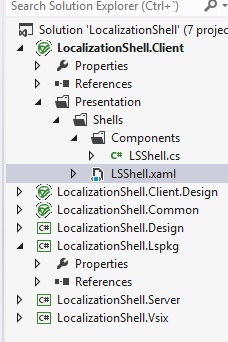
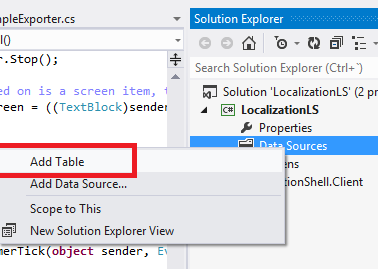
Re-open LocalizationLS
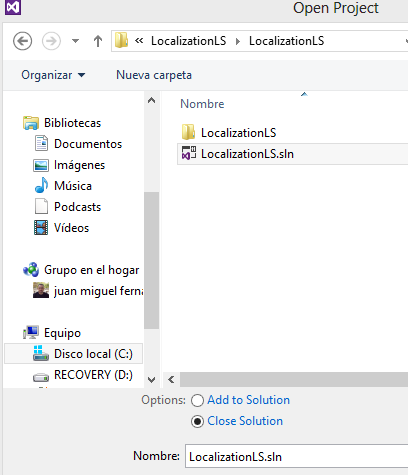
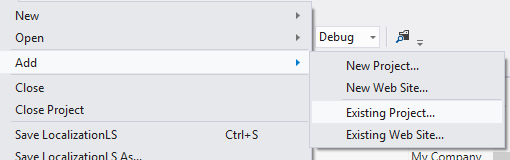
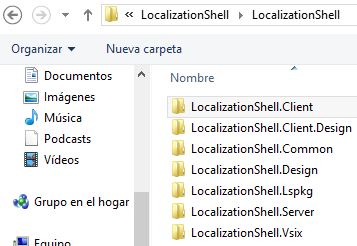
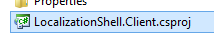
Add LocalizationShell Client to project.
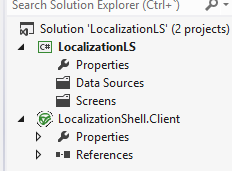
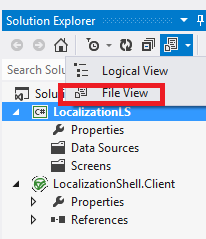
We switch to File View
Add Reference to LocalizationShell
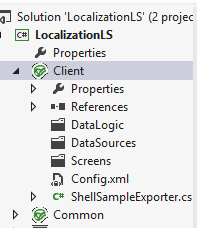


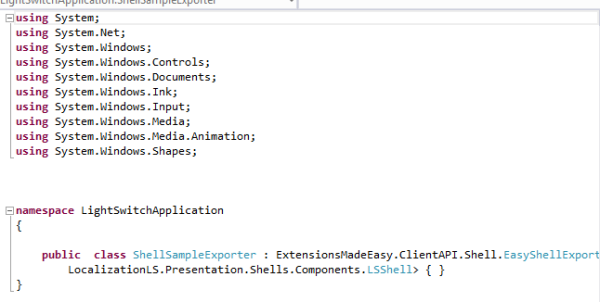
Copy ShellSampleExporter to LocalizationLS.Client

Recorte de pantalla realizado: 22/11/2012 7:30
Modify protection modifier

Modify ShellSampleExporter:
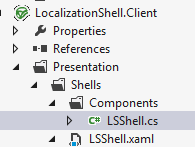
LocalizationShell.Presentation.Shells.Components.LSShell
Step 4 of 10
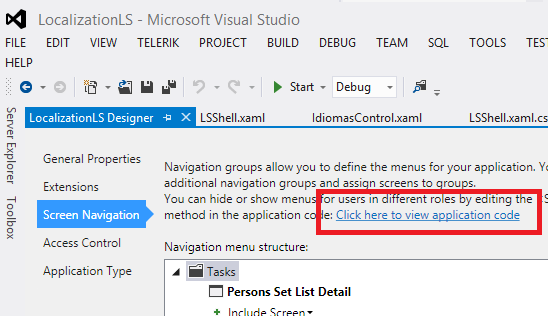
If you check out the official documentation to create a Shell you can visit:http://msdn.microsoft.com/en-us/library/hh290138.aspx
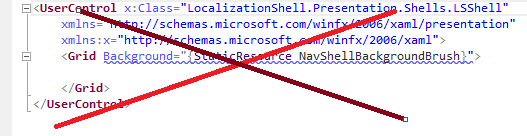
Replaces the Xaml you just created by that other, is basically the same. but adds a ComboBox for the language change. (Although by now commented).
<UserControl x:Class="LocalizationLS.Presentation.Shells.LSShell"
    xmlns="http://schemas.microsoft.com/winfx/2006/xaml/presentation"
    xmlns:x="http://schemas.microsoft.com/winfx/2006/xaml"
    xmlns:windows="clr-namespace:System.Windows;assembly=System.Windows.Controls"
    xmlns:controls="clr-namespace:System.Windows.Controls;assembly=System.Windows.Controls"
    xmlns:ShellHelpers="clr-namespace:Microsoft.LightSwitch.Runtime.Shell.Helpers;assembly=Microsoft.LightSwitch.Client"
    xmlns:local="clr-namespace:LocalizationLS.Presentation.Shells">

    <UserControl.Resources>
        <ResourceDictionary>
            <ResourceDictionary.MergedDictionaries>
                <ResourceDictionary Source="/LocalizationShell.Client;component/Presentation/Shells/TextBlockStyle.xaml" />
            </ResourceDictionary.MergedDictionaries>
        </ResourceDictionary>

        <!-- Convert the boolean value indicating whether or not the workspace is dirty to a Visibility value. -->
        <local:WorkspaceDirtyConverter x:Key="WorkspaceDirtyConverter" />

        <!-- Convert the boolean value indicating whether or not the screen has errors to a Visibility value. -->
        <local:ScreenHasErrorsConverter x:Key="ScreenHasErrorsConverter" />

        <!-- Convert the enumeration of errors into a single string. -->
        <local:ScreenResultsConverter x:Key="ScreenResultsConverter" />

        <!-- Convert the current user to a "default" value when authentication is not enabled. -->
        <local:CurrentUserConverter x:Key="CurrentUserConverter" />

        <!-- Template that is used for the header of each tab item: -->
        <DataTemplate x:Key="TabItemHeaderTemplate">
            <Border BorderBrush="{StaticResource ScreenTabBorderBrush}">
                <StackPanel Orientation="Horizontal">
                    <TextBlock Style="{StaticResource TextBlockFontsStyle}" Text="{Binding DisplayName}" Foreground="{StaticResource ScreenTabTextBrush}" />
                    <TextBlock Style="{StaticResource TextBlockFontsStyle}" Text="*"
                               Visibility="{Binding IsDirty, Converter={StaticResource WorkspaceDirtyConverter}}"
                               Margin="5, 0, 5, 0" />
                    <TextBlock Style="{StaticResource TextBlockFontsStyle}" Text="!"
                               Visibility="{Binding ValidationResults.HasErrors, Converter={StaticResource ScreenHasErrorsConverter}}"
                               Margin="5, 0, 5, 0" Foreground="Red" FontWeight="Bold">
                        <ToolTipService.ToolTip>
                            <ToolTip Content="{Binding ValidationResults, Converter={StaticResource ScreenResultsConverter}}" />
                        </ToolTipService.ToolTip>
                    </TextBlock>
                    <Button Height="16"
                            Width="16"
                            Padding="0"
                            Margin="5, 0, 0, 0"
                            Click="OnClickTabItemClose">X</Button>
                </StackPanel>
            </Border>
        </DataTemplate>
    </UserControl.Resources>

    <Grid x:Name="LayoutRoot" Background="{StaticResource NavShellBackgroundBrush}">
        <Grid.ColumnDefinitions>
            <ColumnDefinition Width="Auto" />
            <ColumnDefinition Width="*" />
        </Grid.ColumnDefinitions>
        <Grid.RowDefinitions>
            <RowDefinition Height="Auto" />
            <RowDefinition Height="5*" />
            <RowDefinition Height="*" />
            <RowDefinition Height="Auto" />
        </Grid.RowDefinitions>

        <!-- The command panel is a horizontally oriented list box whose data context is set to the  -->
        <!-- CommandsViewModel.  The ItemsSource of this list box is data bound to the ShellCommands -->
        <!-- property.  This results in each item being bound to an instance of an IShellCommand.    -->
        <!--                                                                                         -->
        <!-- The attribute 'ShellHelpers:ComponentViewModelService.ViewModelName' is the manner by   -->
        <!-- which a control specifies the view model that is to be set as its data context.  In     -->
        <!-- case, the view model is identified by the name 'Default.CommandsViewModel'.             -->
        <ListBox x:Name="CommandPanel" Grid.Column="0" Grid.Row="0" Grid.ColumnSpan="2" Background="{StaticResource RibbonBackgroundBrush}"
                        ShellHelpers:ComponentViewModelService.ViewModelName="Default.CommandsViewModel"
                        ItemsSource="{Binding ShellCommands}">

            <ListBox.ItemsPanel>
                <ItemsPanelTemplate>
                    <StackPanel Orientation="Horizontal" />
                </ItemsPanelTemplate>
            </ListBox.ItemsPanel>
            <ListBox.ItemTemplate>
                <DataTemplate>
                    <!-- Each item in the list box will be a button whose content is the following:         -->
                    <!--    1.  An image, which is bound to the Image property of the IShellCommand         -->
                    <!--    2.  A text block whose text is bound to the DisplayName of the IShellCommand   -->
                    <StackPanel Orientation="Horizontal">
                        <!-- The button be enabled or disabled according to the IsEnabled property of  the -->
                        <!-- IShellCommand.  The handler for the click event will execute the command.  -->
                        <Button Click="GeneralCommandHandler"
                                IsEnabled="{Binding IsEnabled}"
                                Style="{x:Null}"
                                Background="{StaticResource ButtonBackgroundBrush}"
                                Margin="1">

                            <Grid>
                                <Grid.RowDefinitions>
                                    <RowDefinition Height="32" />
                                    <RowDefinition MinHeight="24" Height="*"/>
                                </Grid.RowDefinitions>
                                <Image Grid.Row="0"
                                       Source="{Binding Image}"
                                       Width="32"
                                       Height="32"
                                       Stretch="UniformToFill"
                                       Margin="0"
                                       VerticalAlignment="Top"
                                       HorizontalAlignment="Center" />
                                <TextBlock Grid.Row="1"
                                           Text="{Binding DisplayName}"
                                           TextAlignment="Center"
                                           TextWrapping="Wrap"
                                           Style="{StaticResource TextBlockFontsStyle}"
                                           MaxWidth="64" />
                            </Grid>
                        </Button>
                    </StackPanel>
                </DataTemplate>
            </ListBox.ItemTemplate>
        </ListBox>

        <!-- Navigation view is a simple tree view whose ItemsSource property is bound to -->
        <!-- the collection returned from the NavigationItems property of the Navigation  -->
        <!-- view model.                                                                  -->
        <controls:TreeView x:Name="ScreenTree" Grid.Column="0" Grid.Row="1" Grid.RowSpan="2"
                  Background="{StaticResource NavShellBackgroundBrush}"
                  ShellHelpers:ComponentViewModelService.ViewModelName="Default.NavigationViewModel"
                  ItemsSource="{Binding NavigationItems}"
                  Loaded="OnTreeViewLoaded">
            <controls:TreeView.ItemTemplate>
                <!-- Each navigation item may have children, so set up the binding to the -->
                <!-- Children property of the INavigationGroup                            -->
                <windows:HierarchicalDataTemplate ItemsSource="{Binding Children}">
                    <!-- Each item in the TreeView is a TextBlock whose text value is bound to the DisplayName property of the INavigationItem -->
                    <TextBlock Style="{StaticResource TextBlockFontsStyle}"
                               Text="{Binding DisplayName}"
                               Foreground="{StaticResource NormalFontBrush}"
                               MouseLeftButtonDown="NavigationItemLeftButtonDown" />
                </windows:HierarchicalDataTemplate>
            </controls:TreeView.ItemTemplate>
        </controls:TreeView>

        <controls:GridSplitter Grid.Column="0"
                          Grid.Row="1"
                          Grid.RowSpan="2"
                          Style="{x:Null}"
                          Width="5"
                          Name="gridSplitter1"
                          Background="Transparent"
                          HorizontalAlignment="Right"
                          VerticalAlignment="Stretch" />

        <!-- Each screen will be displayed in a tab in a tab control.  The individual TabItem -->
        <!-- controls are created in code.                                                    -->
        <controls:TabControl x:Name="ScreenArea"
                             Grid.Column="1"
                             Grid.Row="1"
                             Grid.RowSpan="2"
                             Background="{StaticResource NavShellBackgroundBrush}"
                             SelectionChanged="OnTabItemSelectionChanged">
        </controls:TabControl>

        <!-- The name of the current user is displayed in the lower-left corner of the shell. -->
        <Grid Grid.Column="0" Grid.Row="3" Grid.ColumnSpan="2">
            <Grid.ColumnDefinitions>
                <ColumnDefinition Width="Auto" />
                <ColumnDefinition Width="Auto" />
                <ColumnDefinition Width="Auto" />
            </Grid.ColumnDefinitions>

            <TextBlock Grid.Column="0" Style="{StaticResource TextBlockFontsStyle}" Text="Current User: " Foreground="{StaticResource NormalFontBrush}"/>

            <!-- This TextBlock has its data context set to the CurrentUserViewModel, from which the -->
            <!-- CurrentUserDisplayName property is used to provide the name of the user displayed.  -->
            <TextBlock Grid.Column="1"
                       Style="{StaticResource TextBlockFontsStyle}"
                       ShellHelpers:ComponentViewModelService.ViewModelName="Default.CurrentUserViewModel"
                       Text="{Binding CurrentUserDisplayName, Converter={StaticResource CurrentUserConverter}}"
                       Foreground="{StaticResource NormalFontBrush}"/>

             <!--<local:IdiomasControl Grid.Column="2" />-->
        </Grid>
    </Grid>

</UserControl>
To create the MyScreenObject class
using System;
using System.Collections.Generic;
using System.ComponentModel;
using System.Linq;
using System.Windows;

namespace LocalizationLS.Presentation.Shells
{
    using Microsoft.LightSwitch;
    using Microsoft.LightSwitch.Client;
    using Microsoft.LightSwitch.Details;
    using Microsoft.LightSwitch.Details.Client;
    using Microsoft.LightSwitch.Utilities;

    public class MyScreenObject : IScreenObject, INotifyPropertyChanged
    {
        private IScreenObject screenObject;
        private bool dirty;
        private List<IWeakEventListener> dataServicePropertyChangedListeners;

        public event PropertyChangedEventHandler PropertyChanged;

        internal MyScreenObject(IScreenObject screenObject)
        {
            this.screenObject = screenObject;
            this.dataServicePropertyChangedListeners = new List<IWeakEventListener>();

            // Register for property changed events on the details object.
            ((INotifyPropertyChanged)screenObject.Details).PropertyChanged += this.OnDetailsPropertyChanged;

            // Register for changed events on each of the data services.
            IEnumerable<IDataService> dataServices = screenObject.Details.DataWorkspace.Details.Properties.All().OfType<IDataWorkspaceDataServiceProperty>().Select(p => p.Value);

            foreach (IDataService dataService in dataServices)
                this.dataServicePropertyChangedListeners.Add(((INotifyPropertyChanged)dataService.Details).CreateWeakPropertyChangedListener(this, this.OnDataServicePropertyChanged));
        }

        private void OnDetailsPropertyChanged(object sender, PropertyChangedEventArgs e)
        {
            if (String.Equals(e.PropertyName, "ValidationResults", StringComparison.OrdinalIgnoreCase))
            {
                if (null != this.PropertyChanged)
                    PropertyChanged(this, new PropertyChangedEventArgs("ValidationResults"));
            }
        }

        private void OnDataServicePropertyChanged(object sender, PropertyChangedEventArgs e)
        {
            IDataService dataService = ((IDataServiceDetails)sender).DataService;

            this.IsDirty = dataService.Details.HasChanges;
        }

        internal IScreenObject RealScreenObject
        {
            get
            {
                return this.screenObject;
            }
        }

        public bool IsDirty
        {
            get
            {
                return this.dirty;
            }
            set
            {
                this.dirty = value;

                if (null != this.PropertyChanged)
                    PropertyChanged(this, new PropertyChangedEventArgs("IsDirty"));
            }
        }

        public ValidationResults ValidationResults
        {
            get
            {
                return this.screenObject.Details.ValidationResults;
            }
        }

        public IScreenDetails Details
        {
            get
            {
                return this.screenObject.Details;
            }
        }

        public string Name
        {
            get
            {
                return this.screenObject.Name;
            }
        }

        public string DisplayName
        {
            get
            {
                return this.screenObject.DisplayName;
            }
            set
            {
                this.screenObject.DisplayName = value;
            }
        }

        public string Description
        {
            get
            {
                return this.screenObject.Description;
            }
            set
            {
                this.screenObject.Description = value;
            }
        }

        public bool CanSave
        {
            get
            {
                return this.screenObject.CanSave;
            }
        }

        public void Save()
        {
            this.screenObject.Save();
        }

        public void Refresh()
        {
            this.screenObject.Refresh();
        }

        public void Close(bool promptUserToSave)
        {
            this.screenObject.Close(promptUserToSave);
        }

        IBusinessDetails IBusinessObject.Details
        {
            get
            {
                return ((IBusinessObject)this.screenObject).Details;
            }
        }

        IStructuralDetails IStructuralObject.Details
        {
            get
            {
                return ((IStructuralObject)this.screenObject).Details;
            }
        }

        IDetails IObjectWithDetails.Details
        {
            get
            {
                return ((IObjectWithDetails)this.screenObject).Details;
            }
        }
    }
}
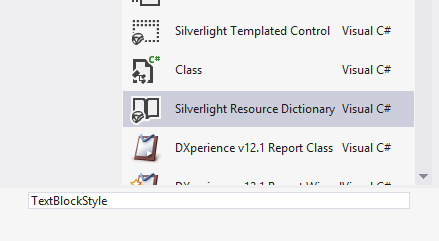
Add Silverlight Resource Dictionary TextBlockStyle
<ResourceDictionary
    xmlns="http://schemas.microsoft.com/winfx/2006/xaml/presentation"
    xmlns:x="http://schemas.microsoft.com/winfx/2006/xaml"
    xmlns:local="clr-namespace:Microsoft.LightSwitch.Presentation.Framework.Helpers;assembly=Microsoft.LightSwitch.Client">

    <Style x:Key="TextBlockFontsStyle" TargetType="TextBlock">
        <Setter Property="FontFamily" Value="{StaticResource NormalFontFamily}" />
        <Setter Property="FontSize" Value="{StaticResource NormalFontSize}" />
        <Setter Property="FontWeight" Value="{StaticResource NormalFontWeight}" />
        <Setter Property="FontStyle" Value="{StaticResource NormalFontStyle}" />
    </Style>

</ResourceDictionary>
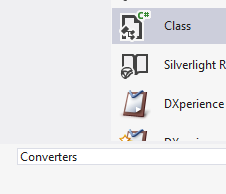
Add Converters.cs
using System;
using System.Collections.Generic;
using System.Globalization;
using System.Linq;
using System.Text;
using System.Windows;
using System.Windows.Data;
using System.Windows.Media;

namespace LocalizationLS.Presentation.Shells
{
    using Microsoft.LightSwitch;
    using Microsoft.LightSwitch.Details;
    using Microsoft.LightSwitch.Client;
    using Microsoft.LightSwitch.Details.Client;

    public class WorkspaceDirtyConverter : IValueConverter
    {
        public object Convert(object value, Type targetType, object parameter, CultureInfo culture)
        {
            return (bool)value ? Visibility.Visible : Visibility.Collapsed;
        }

        public object ConvertBack(object value, Type targetType, object parameter, CultureInfo culture)
        {
            throw new NotSupportedException();
        }
    }

    public class ScreenHasErrorsConverter : IValueConverter
    {
        public object Convert(object value, Type targetType, object parameter, CultureInfo culture)
        {
            return (bool)value ? Visibility.Visible : Visibility.Collapsed;
        }

        public object ConvertBack(object value, Type targetType, object parameter, CultureInfo culture)
        {
            throw new NotSupportedException();
        }
    }

    public class ScreenResultsConverter : IValueConverter
    {
        public object Convert(object value, Type targetType, object parameter, CultureInfo culture)
        {
            ValidationResults results = (ValidationResults)value;
            StringBuilder sb = new StringBuilder();

            foreach (ValidationResult result in results.Errors)
                sb.AppendLine(String.Format("Error: {0}", result.Message));

            return sb.ToString();
        }

        public object ConvertBack(object value, Type targetType, object parameter, CultureInfo culture)
        {
            throw new NotSupportedException();
        }
    }

    public class CurrentUserConverter : IValueConverter
    {
        public object Convert(object value, Type targetType, object parameter, CultureInfo culture)
        {
            string currentUser = (string)value;

            if ((null == currentUser) || (0 == currentUser.Length))
                return "Authentication is not enabled.";

            return currentUser;
        }

        public object ConvertBack(object value, Type targetType, object parameter, CultureInfo culture)
        {
            throw new NotSupportedException();
        }
    }
}
Change LocalizationShell.Presentation.Shell.LSShell.cs

C:\Program Files (x86)\Microsoft Visual Studio 11.0\Common7\IDE\LightSwitch\Client\Microsoft.LightSwitch.ExportProvider.dll
using System;
using System.Collections.Generic;
using System.Collections.Specialized;
using System.Linq;
using System.Net;
using System.Windows;
using System.Windows.Controls;
using System.Windows.Data;
using System.Windows.Documents;
using System.Windows.Input;
using System.Windows.Media;
using System.Windows.Media.Animation;
using System.Windows.Media.Imaging;
using System.Windows.Shapes;
using System.Windows.Threading;
using Microsoft.VisualStudio.ExtensibilityHosting;
using Microsoft.LightSwitch.Sdk.Proxy;
using Microsoft.LightSwitch.Runtime.Shell;
using Microsoft.LightSwitch.Runtime.Shell.View;
using Microsoft.LightSwitch.Runtime.Shell.ViewModels.Commands;
using Microsoft.LightSwitch.Runtime.Shell.ViewModels.Navigation;
using Microsoft.LightSwitch.Runtime.Shell.ViewModels.Notifications;
using Microsoft.LightSwitch.BaseServices.Notifications;
using Microsoft.LightSwitch.Client;
using Microsoft.LightSwitch.Framework.Client;
using Microsoft.LightSwitch.Threading;
using Microsoft.LightSwitch.Details;


namespace LocalizationLS.Presentation.Shells
{
    public partial class LSShell : UserControl
    {
        private IServiceProxy serviceProxy;
        private List<object> weakHelperObjects = new List<object>();
        private DispatcherTimer doubleClickTimer;

        public LSShell()
        {
            this.InitializeComponent();

            // Use the notification service, found on the service proxy, to subscribe to the ScreenOpened,
            // ScreenClosed, and ScreenReloaded notifications.
            this.ServiceProxy.NotificationService.Subscribe(typeof(ScreenOpenedNotification), this.OnScreenOpened);
            this.ServiceProxy.NotificationService.Subscribe(typeof(ScreenClosedNotification), this.OnScreenClosed);
            this.ServiceProxy.NotificationService.Subscribe(typeof(ScreenReloadedNotification), this.OnScreenRefreshed);

            // Sign up for the Closing event on the user settings service so we can commit any settings changes.
            this.ServiceProxy.UserSettingsService.Closing += this.OnSettingsServiceClosing;

            // Read in the saved settings from the user settings service.  This shell saves the width of
            // the two columns that are separated by a grid splitter.
            double width1 = this.ServiceProxy.UserSettingsService.GetSetting<double>("RootColumn1_Size");
            double width2 = this.ServiceProxy.UserSettingsService.GetSetting<double>("RootColumn2_Size");

            // If the settings were successfully retrieved, then set the column widths accordingly.
            if (width1 != default(double))
                this.LayoutRoot.ColumnDefinitions[0].Width = new GridLength(width1, GridUnitType.Star);

            if (width2 != default(double))
                this.LayoutRoot.ColumnDefinitions[1].Width = new GridLength(width2, GridUnitType.Star);

            // Initialize the double-click timer, which is used for managing double clicks on an item in the tree view.
            this.doubleClickTimer = new DispatcherTimer();
            this.doubleClickTimer.Interval = new TimeSpan(0, 0, 0, 0, 200);
            this.doubleClickTimer.Tick += new EventHandler(this.OnDoubleClickTimerTick);
        }

        public void OnSettingsServiceClosing(object sender, EventArgs e)
        {
            // This function will get called when the settings service is closing, which happens
            // when the application is shut down.  In response to that event we will save the
            // current widths of the two columns.
            this.ServiceProxy.UserSettingsService.SetSetting("RootColumn1_Size", this.LayoutRoot.ColumnDefinitions[0].ActualWidth);
            this.ServiceProxy.UserSettingsService.SetSetting("RootColumn2_Size", this.LayoutRoot.ColumnDefinitions[1].ActualWidth);
        }

        public void OnScreenOpened(Notification n)
        {
            // This method is called when a screen has been opened by the run time.  In response to
            // this, we need to create a tab item and set its content to be the UI for the newly
            // opened screen.
            ScreenOpenedNotification screenOpenedNotification = (ScreenOpenedNotification)n;
            IScreenObject screenObject = screenOpenedNotification.Screen;
            IScreenView view = this.ServiceProxy.ScreenViewService.GetScreenView(screenObject);

            // Create a tab item and bind its header to the display name of the screen.
            TabItem ti = new TabItem();
            DataTemplate template = (DataTemplate)this.Resources["TabItemHeaderTemplate"];
            UIElement element = (UIElement)template.LoadContent();

            // The IScreenObject does not contain properties indicating if the screen has
            // changes or validation errors.  As such, we have created a thin wrapper around the
            // screen object that does expose this functionality.  This wrapper, a class called
            // MyScreenObject, is what we'll use as the data context for the tab item.
            ti.DataContext = new MyScreenObject(screenObject);
            ti.Header = element;
            ti.HeaderTemplate = template;
            ti.Content = view.RootUI;

            // Add the tab item to the tab control.
            this.ScreenArea.Items.Add(ti);
            this.ScreenArea.SelectedItem = ti;

            // Set the currently active screen in the active screens view model.
            this.ServiceProxy.ActiveScreensViewModel.Current = screenObject;
        }

        public void OnScreenClosed(Notification n)
        {
            // A screen has been closed and therefore removed from the application's
            // collection of active screens.  In response to this, we need to do
            // two things:
            //  1.  Remove the tab item that was displaying this screen.
            //  2.  Set the "current" screen to the screen that will be displayed
            //      in the tab item that will be made active.
            ScreenClosedNotification screenClosedNotification = (ScreenClosedNotification)n;
            IScreenObject screenObject = screenClosedNotification.Screen;

            foreach (TabItem ti in this.ScreenArea.Items)
            {
                // We need to get the real IScreenObject from the instance of the MyScreenObject.
                IScreenObject realScreenObject = ((MyScreenObject)ti.DataContext).RealScreenObject;

                if (realScreenObject == screenObject)
                {
                    this.ScreenArea.Items.Remove(ti);
                    break;
                }
            }

            // If there are any tab items left, set the current tab to the last one in the list
            // AND set the current screen to be the screen contained within that tab item.
            int count = this.ScreenArea.Items.Count;

            if (count > 0)
            {
                TabItem ti = (TabItem)this.ScreenArea.Items[count - 1];

                this.ScreenArea.SelectedItem = ti;
                this.ServiceProxy.ActiveScreensViewModel.Current = ((MyScreenObject)(ti.DataContext)).RealScreenObject;
            }
        }

        public void OnScreenRefreshed(Notification n)
        {
            // When a screen is refreshed, the run time actually creates a new IScreenObject
            // for it and discards the old one.  So in response to this notification,
            // replace the data context for the tab item that contains
            // this screen with a wrapper (MyScreenObject) for the new IScreenObject instance.
            ScreenReloadedNotification srn = (ScreenReloadedNotification)n;

            foreach (TabItem ti in this.ScreenArea.Items)
            {
                IScreenObject realScreenObject = ((MyScreenObject)ti.DataContext).RealScreenObject;

                if (realScreenObject == srn.OriginalScreen)
                {
                    IScreenView view = this.ServiceProxy.ScreenViewService.GetScreenView(srn.NewScreen);

                    ti.Content = view.RootUI;
                    ti.DataContext = new MyScreenObject(srn.NewScreen);
                    break;
                }
            }
        }

        private IServiceProxy ServiceProxy
        {
            get
            {
                // Get the service proxy that provides access to the needed LightSwitch services.
                if (null == this.serviceProxy)
                    this.serviceProxy = VsExportProviderService.GetExportedValue<IServiceProxy>();

                return this.serviceProxy;
            }
        }

        private void GeneralCommandHandler(object sender, RoutedEventArgs e)
        {
            // This function will get called when the user clicks one of the buttons on
            // the command panel.  The sender is the button whose data context is the
            // IShellCommand.
            //
            // In order to execute the command (asynchronously) we simply call the
            // ExecuteAsync method on the ExecutableObject property of the command.
            IShellCommand command = (IShellCommand)((Button)sender).DataContext;

            command.ExecutableObject.ExecuteAsync();
        }

        private void OnTreeViewLoaded(object sender, RoutedEventArgs e)
        {
            this.ScreenTree.Dispatcher.BeginInvoke(() =>
            {
                TreeView tv = (TreeView)sender;

                foreach (object item in tv.Items)
                {
                    TreeViewItem tvi = tv.ItemContainerGenerator.ContainerFromItem(item) as TreeViewItem;

                    tvi.IsExpanded = true;
                }
            });
        }

        private void OnTabItemSelectionChanged(object sender, SelectionChangedEventArgs e)
        {
            // When the user selects a tab item, set the "active" screen
            // in the ActiveScreensView model.  Doing this causes the commands view
            // model to be udpated to reflect the commands of the current screen.
            if (e.AddedItems.Count > 0)
            {
                TabItem selectedItem = (TabItem)e.AddedItems[0];

                if (null != selectedItem)
                {
                    IScreenObject screenObject = ((MyScreenObject)selectedItem.DataContext).RealScreenObject;

                    this.ServiceProxy.ActiveScreensViewModel.Current = screenObject;
                }
            }
        }

        private void OnClickTabItemClose(object sender, RoutedEventArgs e)
        {
            // When the user closes a tab, we simply need to close the corresponding
            // screen object.  The only caveat here is that the call to the Close
            // method needs to happen on the logic thread for the screen.  To do this,
            // use the Dispatcher object for the screen.
            IScreenObject screenObject = ((Button)sender).DataContext as IScreenObject;

            if (null != screenObject)
            {
                screenObject.Details.Dispatcher.EnsureInvoke(() =>
                {
                    screenObject.Close(true);
                });
            }
        }

        private void NavigationItemLeftButtonDown(object sender, MouseButtonEventArgs e)
        {
            if (this.doubleClickTimer.IsEnabled)
            {
                this.doubleClickTimer.Stop();

                // If the item clicked on is a screen item, then open the screen.
                INavigationScreen screen = ((TextBlock)sender).DataContext as INavigationScreen;

                if (null != screen)
                    screen.ExecutableObject.ExecuteAsync();
            }
            else
                this.doubleClickTimer.Start();
        }

        private void OnDoubleClickTimerTick(object sender, EventArgs e)
        {
            this.doubleClickTimer.Stop();
        }
    }
}
Añadir las referencias a LocalizationShell.Client
C:\Program Files (x86)\Microsoft Visual Studio 11.0\Common7\IDE\LightSwitch\Client\Microsoft.LightSwitch.ExportProvider.dll
C:\Program Files (x86)\Microsoft SDKs\Silverlight\v5.0\Libraries\Client\System.Windows.Controls.dll

Build Project: Build succeeed 🙂

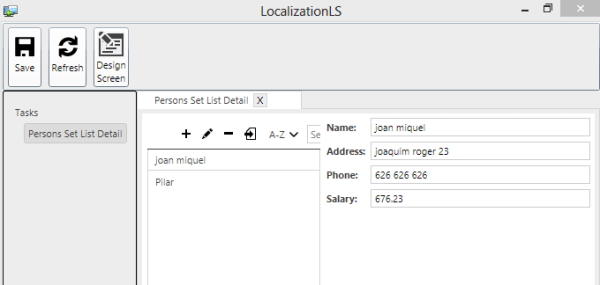
Step 5 of 10 Add Elements to LocalizationLS
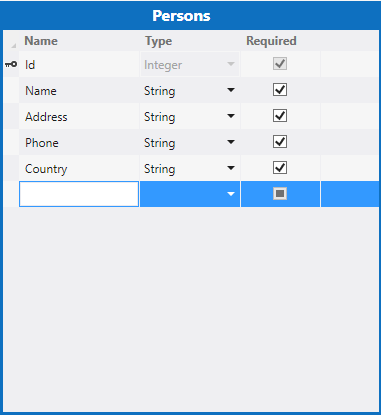
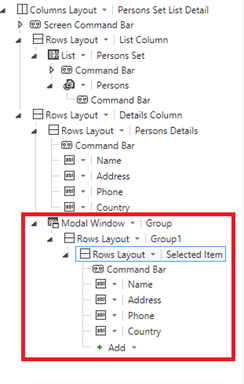
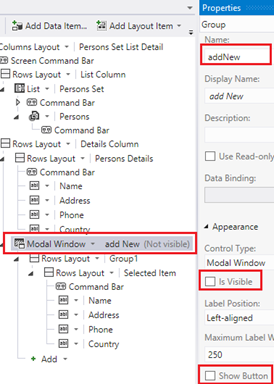
Create table Persons

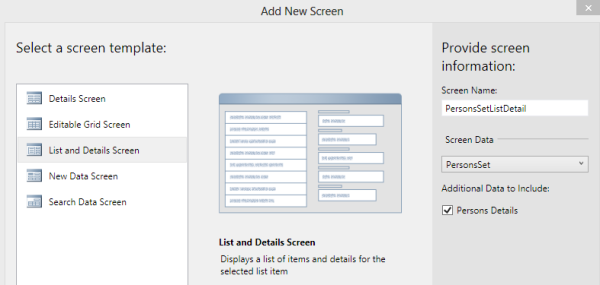
Create Screen (ListDetail)

Test Data
Step 6 of 10
Copy folder EventAgreggator from codelocalization.rar downloaded.
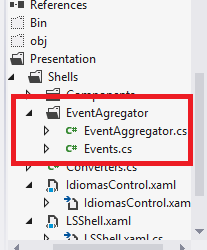
add References to:
Microsoft.Practices.Composite.dll
Microsoft.Practices.Composite.Presentation.dll
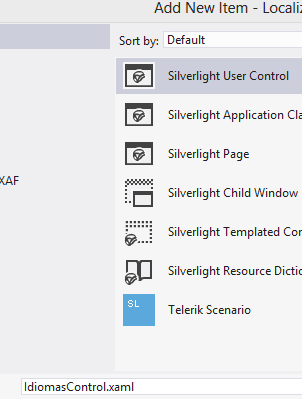
Step 7 of 10 IdiomasControl
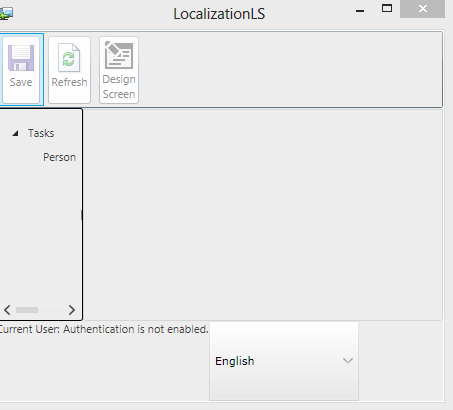
Add a new User Control into Shell (LocalizationShell.Client) named IdiomasControl.

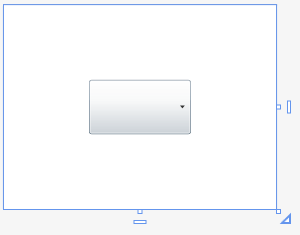
<UserControl x:Class="LocalizationLS.Presentation.Shells.IdiomasControl"
    xmlns="http://schemas.microsoft.com/winfx/2006/xaml/presentation"
    xmlns:x="http://schemas.microsoft.com/winfx/2006/xaml"
    xmlns:d="http://schemas.microsoft.com/expression/blend/2008"
    xmlns:mc="http://schemas.openxmlformats.org/markup-compatibility/2006"
    mc:Ignorable="d"
    d:DesignHeight="300" d:DesignWidth="400">

    <Grid x:Name="LayoutRoot" Background="White">

        <ComboBox Name="ComboBoxIdiomas" Grid.Column="0" Width="150" Height="80" SelectionChanged="ComboBoxIdiomas_SelectionChanged">
            <ComboBoxItem Content="English" IsSelected="True"/>
            <ComboBoxItem Content="Spanish"/>
            <ComboBoxItem Content="Catalán"/>
            <ComboBoxItem Content="French"/>
        </ComboBox>
    </Grid>
</UserControl>
using System;
using System.Collections.Generic;
using System.Globalization;
using System.Linq;
using System.Net;
using System.Resources;
using System.Threading;
using System.Windows;
using System.Windows.Controls;
using System.Windows.Documents;
using System.Windows.Input;
using System.Windows.Media;
using System.Windows.Media.Animation;
using System.Windows.Shapes;
using EventAggregation;


namespace LocalizationLS.Presentation.Shells
{

    public partial class IdiomasControl : UserControl
    {
        IEventAggregator Aggregator = new EventAggregator();


        public IdiomasControl()
        {
            InitializeComponent();


        }

        private void ComboBoxIdiomas_SelectionChanged(object sender, SelectionChangedEventArgs e)
        {
            //Aggregator = new EventAggregator();

            System.Windows.Controls.ComboBox ComboBoxIdiomas = (System.Windows.Controls.ComboBox)sender;

            switch (ComboBoxIdiomas.Items.IndexOf(ComboBoxIdiomas.SelectedItem))
            {
                case 0: // English
                    Thread.CurrentThread.CurrentCulture = Thread.CurrentThread.CurrentUICulture = new System.Globalization.CultureInfo("en-US");
                    Aggregator.SendMessage<MessageCambioIdioma, string>(new MessageCambioIdioma { Payload = "en-US" });

                    break;
                case 1: // Spanish
                    Thread.CurrentThread.CurrentCulture = Thread.CurrentThread.CurrentUICulture = new System.Globalization.CultureInfo("es");
                    Aggregator.SendMessage<MessageCambioIdioma, string>(new MessageCambioIdioma { Payload = "es" });
                    break;
                case 2: // Catalan
                    Thread.CurrentThread.CurrentCulture = Thread.CurrentThread.CurrentUICulture = new System.Globalization.CultureInfo("ca-ES");
                    Aggregator.SendMessage<MessageCambioIdioma, string>(new MessageCambioIdioma { Payload = "ca-ES" });
                    break;
                case 3: // French
                    Thread.CurrentThread.CurrentCulture = Thread.CurrentThread.CurrentUICulture = new System.Globalization.CultureInfo("fr");
                    Aggregator.SendMessage<MessageCambioIdioma, string>(new MessageCambioIdioma { Payload = "fr" });
                    break;
                default:
                    break;
            }

        }
    }
}
Uncomment call to usercontrol IdiomasControl into LSShell.xaml
<!–<local:IdiomasControl Grid.Column=»2″ />–>
Step 8 of 10 Resource Files
Copy folder Localization from CodigoLocalizacion.rar downloaded into LocalizationLS.Client
Step 9 of 10 Make Changes in Application.cs
using System;
using System.Linq;
using System.IO;
using System.IO.IsolatedStorage;
using System.Collections.Generic;
using Microsoft.LightSwitch;
using Microsoft.LightSwitch.Framework.Client;
using Microsoft.LightSwitch.Presentation;
using Microsoft.LightSwitch.Presentation.Extensions;
using System.Resources;
using System.Threading;
using LightSwitchApplication.Localization;
using System.Globalization;
using System.Windows;
using EventAggregation;

namespace LightSwitchApplication
{

    public partial class Application
    {
        EventAggregation.IEventAggregator AggregatorCambiaPais { get; set; }

        public ResourceManager man;

        partial void Application_Initialize()
        {
            AggregatorCambiaPais = new EventAggregation.EventAggregator();
            AggregatorCambiaPais.Subscribe<MessageCambioIdioma, string>(OnMessageScreenCambioIdioma);

        }

        public void OnMessageScreenCambioIdioma(PresentationEvent<string> e)
        {
            char[] separator = { ',' };
            if ((string)e.Payload != null)
            {
                string[] PresentationParams = e.Payload.Split(separator);
                switch (PresentationParams[0])
                {
                    case "en-US":
                        man = new ResourceManager("LightSwitchApplication.Localization.AppStrings_en_US", typeof(AppStrings_en_US).Assembly);
                        break;
                    case "ca-ES":
                        man = new ResourceManager("LightSwitchApplication.Localization.AppStrings_ca_ES", typeof(AppStrings_ca_ES).Assembly);
                        break;
                    case "es":
                        man = new ResourceManager("LightSwitchApplication.Localization.AppStrings_es", typeof(AppStrings_es).Assembly);
                        break;
                    case "fr":
                        man = new ResourceManager("LightSwitchApplication.Localization.AppStrings_fr", typeof(AppStrings_fr).Assembly);
                        break;
                    default:

                        break;
                }
            }
        }
    }
}
Step 10 of 10 Changes in PersonsSetListDetail.cs
The code I present here is clearly improved, but it is a good way to understand how it works, I walk the object tree recursively starting from RootContentItem, and I’m referring to the resource file.
This should be repeated in each Screen to locate.(clearly improved)
using System;
using System.Linq;
using System.IO;
using System.IO.IsolatedStorage;
using System.Collections.Generic;
using Microsoft.LightSwitch;
using Microsoft.LightSwitch.Framework.Client;
using Microsoft.LightSwitch.Presentation;
using Microsoft.LightSwitch.Presentation.Extensions;
using Microsoft.LightSwitch.Client;
using System.Text;
using System.Threading;
using System.Globalization;
using System.Reflection;
using System.Resources;


namespace LightSwitchApplication
{
    public partial class PersonsSetListDetail
    {

        partial void PersonsSetListDetail_Activated()
        {
            LocalizeScreenLS();
        }

        private void LocalizeScreenLS()
        {
            StringBuilder stringBuilder = new StringBuilder();
            IContentItemProxy proxy = this.FindControl("RootContentItem");
            proxy.ControlAvailable += (s, e) =>
            {
                var ctrl = e.Control as System.Windows.Controls.Control;
                IContentItem contentItem = ctrl.DataContext as Microsoft.LightSwitch.Presentation.IContentItem;
                LocalizeScreenControl(this, contentItem, stringBuilder);
            };
        }


        private void LocalizeScreenControl(IScreenObject screen, Microsoft.LightSwitch.Presentation.IContentItem item, StringBuilder stringBuilder)
        {
            var c = screen.FindControl(item.Name);
            if (c != null)
            {
                try
                {
                    item.DisplayName = this.Application.man.GetString(item.DisplayName, Thread.CurrentThread.CurrentUICulture);
                }
                catch (Exception)
                {
                    item.DisplayName = item.DisplayName;
                }
            }

            foreach (var i in item.ChildItems)
                LocalizeScreenControl(screen, i, stringBuilder);
        }

    }
}
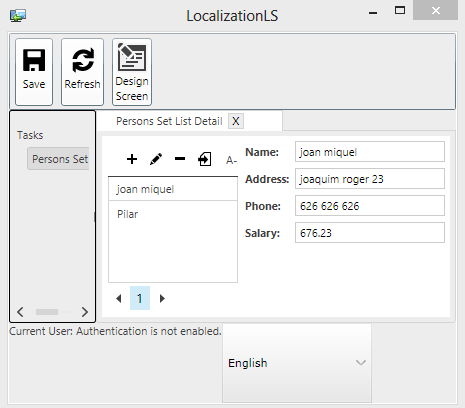
English (en-US)
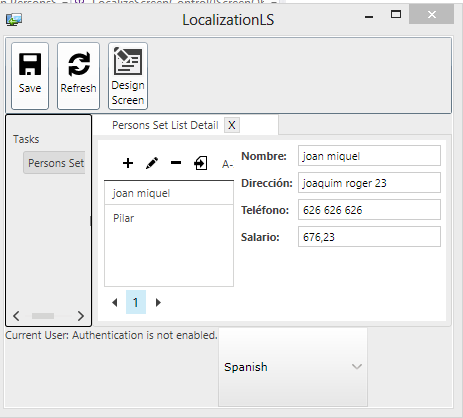
Spanish(es)
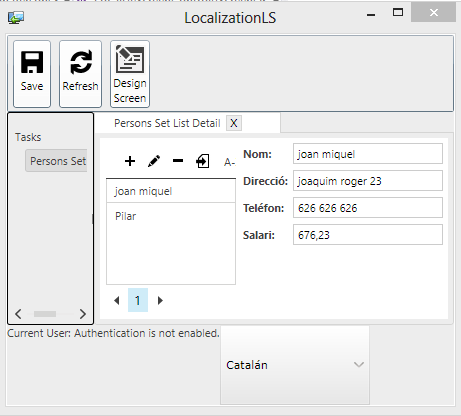
Catalan (ca-ES)
French (fr)

Known Issues.
I have found no way to access the pre-rendering of the display, so that the location of fields that occurs after the labels have been displayed with its original value, ie without trace, this produces an effect somewhat strange when viewing the form, if someone comes up with something would be great.
A turn around can be awkward to leave blank the display name (with a space) and write the label to locate in the description, change the location code for this then appear first form with empty fields and then routine rewrite the screen with the correct titles.
Discussions
LightSwitch is a great tool, and with a little work can make to get to anywhere, I hope Microsoft solves this feature as soon as possible, because in a globalized world is almost basic. I hope this article will encourage everyone to look for alternatives and especially better, thing I am totally safe and that encourages me recursively.
Acknowledgements
Special thanks to all the LightSwitch community. Also thanks to the review of this article realized by Ramón Barrena.
You can test the result of how-to on: http://www.jmlabs.org.es/localizationls